However, it is required if you wish to capture video with audio enabled.
Note that the application has to be active before the filter/effect pills listed above become functional.
Webcam App Usage
Clicking the large camera icon at the top of the screen will load the HTMLSnap webcam application and request access to your device or devices. Once you have allowed access to the correct device or devices, you will be given a toolbars with a selection of buttons. Below will describe the functionality of those buttons in more details.
Past Snaps Sidebar
Click this button to display all of your past captured images or videos for your current session. A new session is created whenever you revisit or refresh the application. Be sure to download any captures that you want to keep, or you can also upload them and save the links for sharing with other people online.
Rotate Camera View
When dragging/swiping the camera view you can set a new orbital position. By clicking this button you can rotate the the orbital position by 90 degrees.
Center Camera View
This button will center and reset the orbital view positions.
Lock Orbitals
Click this button to disable the orbital drag/swipe and lock its current position.
Flip Webcam Material
Click this button to flip the webcam display upside down,
Mirror Webcam Material
Click this button to mirror your webcam display output.
Previous Effect or Filter
Click this button to load and display the previous filter or effect in the webcam application's effects list.
Next Effect or Filter
Click this button to load and display the next filter or effect in the webcam application's effects list.
Capture Time Delay
Toggle this button to enable or disable the time delay functionality. When enabled, there will be a small time delay before your capture starts. The length of this delay can be modified in the controls menu drop down on the top right of the screen under "Time Delay". From a minimum delay of 3 seconds, to a maximum delay of 12 seconds.
Capture Flash
Toggle this button to enable or disable the flash functionality. When enabled, there will be a brief flash of a set colour during any still image capture. The colour of this flash can be changed in the controls under "Flash Color".
Capture Single Image
Click/Tap this button when you are ready to capture a still (single frame) image.
Capture Video Clip
Click/Tap this button when you are ready to capture a short video clip. The length of your captured video clip can be modified in the controls menu drop down on the top right of the screen under "Video Recorder". From a minimum of 3 seconds and a maximum of 120 seconds. To stop the recording immediately, you can click/tap the record button again.
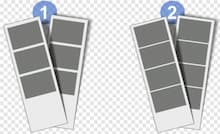
Capture Photo Booth Strips
Click/Tap this button to create a classic photo booth style photo strip. Depending on your "Photo Strip" settings within the controls, this button will capture either 3 or 4 frames for your photo strip.
Controls Menu
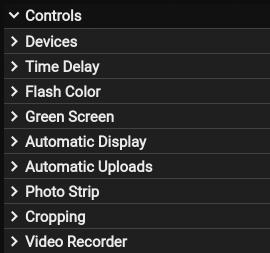
The Controls Menu allows you to modify several application configuration settings.
In the Green Screen options you can enable or disable the green-screen (Chroma Key) feature and change the Key-Color, Similarity Strength and Smoothness properties to best suit your backdrop setup.
In the Time Delay options you will be able to set the time delay duration in seconds, that should occur before the capture takes place.
In the Flash Color option you will be able to set the colour of the flash, that occurs during a still media capture when the flash button is enabled.
In the Video Recorder you will be able to set a capture length in seconds of any of your recorded video clips. Set the FPS (Frames Per Second) that your video clip should capture at and enable or disable the recording of audio (Note: access to both camera and microphone is required for adding audio to your captured clips).
In the Automatic Uploads options you will be able to save some time and cause less interruption to your session, by opting to automatically upload your captures for sharing online. Single frame images, photo booth strips or video capturing can be enabled or disabled independently from the auto upload option.
In the Automatic Display options you will be able to select which media type you would like to automatically open and display in fully screen when the media is captured. You can enable or disable this feature for specific or all media types.
In the Cropping option you can remove additional transparent pixels around the outside of your captured single frame images, by selecting "cropFrame". By default this option is already selected.
In the Photo Strips options you can change the number of captures to add to your strip by setting the "frames" value to 3 or 4. Set the maximum width of your photo strip with the "maxWidth" value. You can also set the size of the border around your captured frames and the start and end gradient colours for your photo strip.

Ever since Google renamed itself Alphabet Inc. and dropped their "Don't Be Evil" motto, they have opted to be evil. Whether they are manipulating their search engine's results, attacking free speech with their ghost/shadow banning on youtube's video comment sections or trying to declare themselves the arbiter of truth, by coercion through their Adsense platform. The ever growing list of their repugnant behaviours continue to display their evil intent.
For those of us that have been paying attention over the years, Google has become one of the most vile corporate dictators that the internet has to offer. Owning over %20 of the Top 100 most popular websites used today.
The only way to kill the beast that Google has become is to stop using their sites, services and products. Admittedly it is very difficult to remove a company as large as Google from our daily internet activities, given that they continue to acquire more sites on top of their already large collection of acquisitions. However, For those that would prefer to not feed the evil beast or tolerate their evil business practices or lack of ethics, we must be pro-active in attempting to remove them from our lives.
Below is a list of Google/Alphabet owned sites or products and where possible we will list alternative sites or products that we should adopt over that of Google's. If you know of more alternatives, then please contact us so we can update this list.
If you are a developer using Google Analytics, then consider reading why you should remove Google Analytics from your sites today.
| Alphabet Inc | Alternative |
|---|---|
| Google (Search) | Brave Search |
| Google Chrome | Brave Browser |
| Gmail | ProtonMail |
| YouTube | Odysee Rumble BrandNewTube Bitchute |
| Adsense | Suggestions ? |
| Firebase | Suggestions ? |
| Tenor | Giphy GfyCat |
| Google Analytics | Plausible Analytics |
| Google Fonts | Font Squirrel |
Start Today
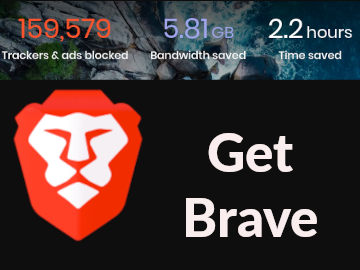
One of the best ways to be proactive is to replace the Google Chrome browser (if that is your browser of choice, which is the case for most people.) with the Brave browser. You will have all the benefits of Chrome without the tracking and the annoying advertisements as standard. You will also save bandwidth and time when you are no longer downloading Google's scripts, that are either designed to spy on you or profit from you. In addition to that, if you choose to view ads through the Brave browser then you will be the one to profit by receiving BATs (Basic Attention Tokens).